Most people who want to learn henna give up after their first wobbly line. The cone slips, the design smudges, and suddenly a beautiful craft feels impossible. But here’s what nobody tells you: even Dubai’s most skilled mehndi artists started with shaky hands on scrap paper. The real problem isn’t talent. It’s not knowing where to start.
This guide walks you through everything: materials, technique, common slip-ups, and the mindset shift that actually makes practice stick. Whether you’ve never touched a cone or you’ve tried a few times and struggled, this is the entry point you’ve been looking for.
What Do Beginners Need to Start Learning Henna?
When you’re just starting out, you need three things: the right materials, a forgiving surface to practice on, and realistic expectations about how long it will take for the stain to develop.
Learning henna for beginners doesn’t require an expensive kit. A fresh natural cone, a smooth glass sheet, and about twenty minutes a day is genuinely enough to build the muscle memory this art demands.
Here’s what to gather before your first session:
- Natural henna cone made with fresh powder, essential oil (tea tree works well), lemon juice, and sugar. Do not use Black Henna, which is sold inexpensively at markets, as it contains PPD and can cause severe skin reactions.
- A glass or plastic sheet is placed over a printed design so you can trace without wasting material on your skin before you’re ready.
- Cotton swabs and tissue kept right beside you, mistakes are easier to fix in the first thirty seconds than after they dry.
- Good lighting, pointed directly at your work surface, is surprisingly responsible for uneven pressure and crooked lines.
- A steady surface at elbow height, because resting your wrist on something stable cuts hand tremor dramatically, something most tutorials skip over.
How Do You Apply Henna Step by Step as a Complete Beginner?
Slowly, with your elbow anchored and your expectations grounded. Most people rush the basics because they want to skip to the florals. That rush is exactly why designs turn out uneven. How to learn henna design comes down to four progressive stages: grip, stroke, shape, and composition. Master each before moving to the next.
Here’s how each stage works:
Step 1. Getting Your Grip and Pressure Right
Holding a henna cone is closer to holding a pastry bag than a pen. Your index finger sits near the tip for direction. Your thumb and middle finger create consistent pressure from behind. The moment you grip too tight, the paste surges out unevenly and small dots turn into blobs. You can also look at “Learn Henna: A Beginner’s Guide” to get more detailed steps.
Practice pressure before you practice design. The two core habits that separate clean work from messy work are these:
- Roll the cone tip across a tissue before each stroke to prevent dried paste from clogging and causing sudden spurts.
- Rest your elbow flat on the table, not hovering; hovering is the single biggest cause of shaky lines in beginners.
- Start every session with ten straight parallel lines before moving to curves; it trains your hand more than ten minutes of freeform doodling ever could.
Step 2. Building Basic Shapes Before Complex Patterns
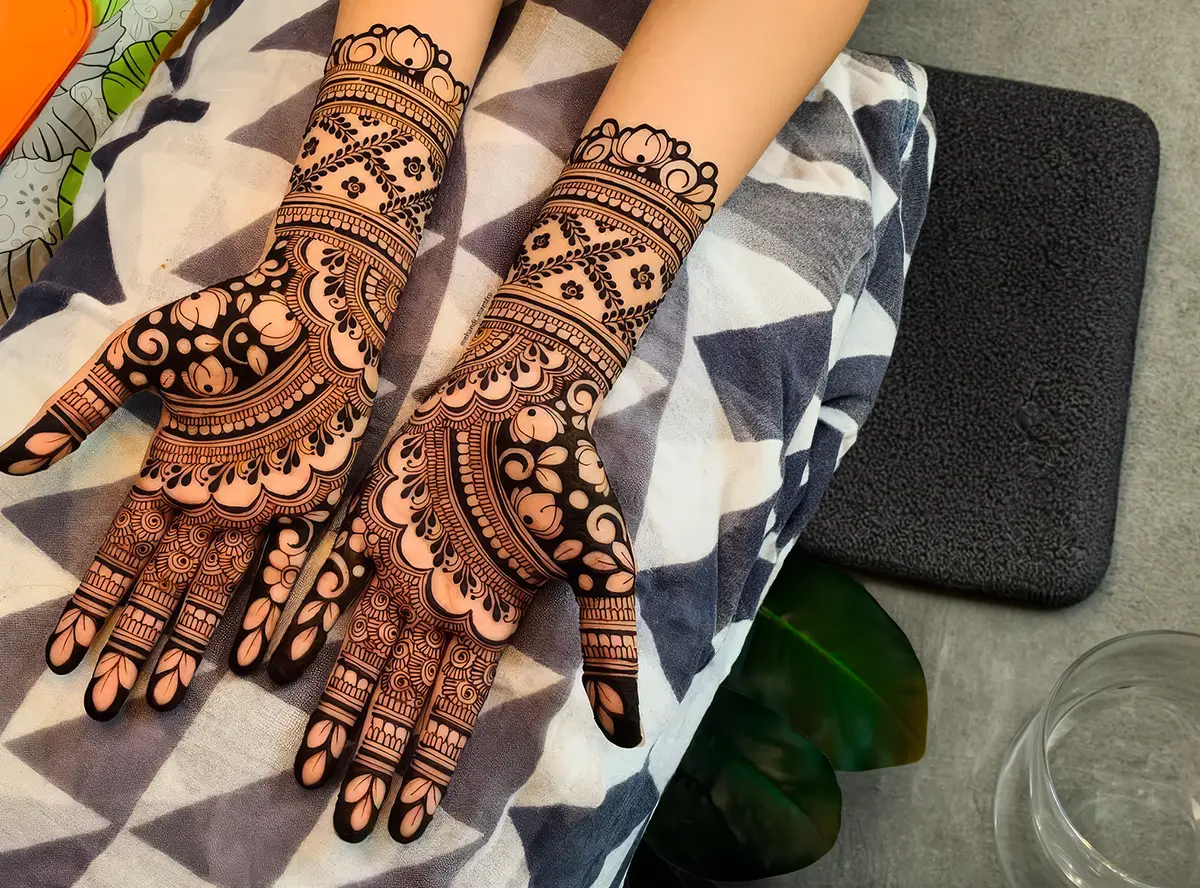
The basics of henna are exactly four strokes: the straight line, the dot, the U-curve (called a “hump” or scallop), and the spiral. Every floral, every paisley, every geometric panel you see in professional work is some combination of these four. No exceptions.
Spend your first two weeks only on these shapes. It sounds boring. It isn’t, you’ll start seeing them everywhere in finished designs, which makes the craft suddenly feel readable rather than intimidating.
Three things to focus on during this phase:
- Draw U-curves in rows, keeping each one the same width; inconsistency here is what makes vine patterns look amateur.
- Practice dots in three sizes deliberately: small, medium, and large, each controlled by how much you squeeze rather than how long you hold the cone in place.
- Spirals should start from the outside in for better control; inside-out spirals tend to collapse at the center when you’re building grip strength.
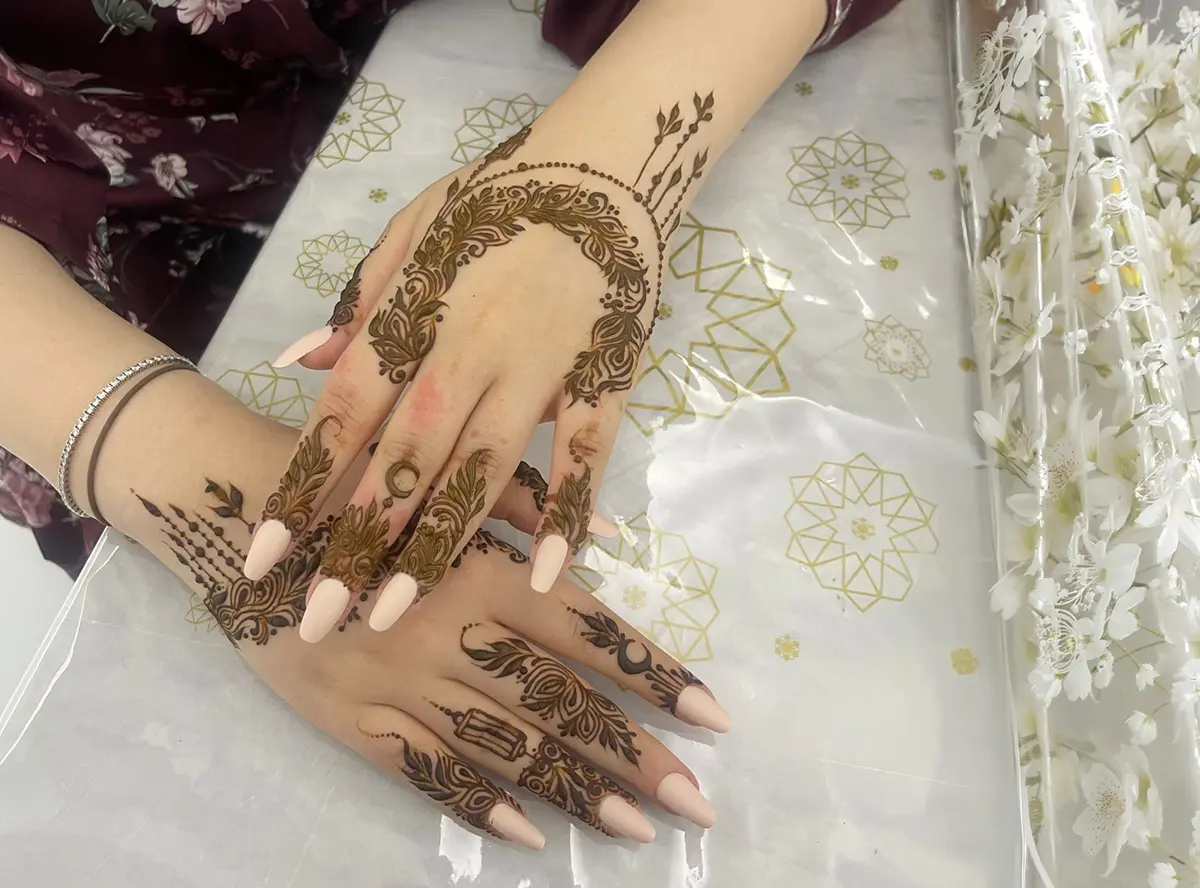
Step 3. Prepping Skin and Getting the Stain Right
Skin prep is something most henna classes in Dubai skip, but it changes the final color more than any other factor. Wash the application area with soap to lift surface oils, then wait five minutes for the skin to dry completely. Moisturizer and sunscreen on the skin can block absorption, resulting in a pale, patchy stain.
Once applied, patience is the whole job. What most beginners misunderstand about color:
- Fresh paste sits orange on the skin; it hasn’t stained yet. The real color develops over 24 to 48 hours as it oxidizes.
- Sealing dry paste with a lemon-sugar mix (equal parts, dabbed gently with a cotton ball) noticeably extends wear time.
- Science Insights publishes an article on the complete process as well: scrape the dry paste off with a card or butter knife; never wash it off with water, because water stops the oxidation process mid-way and dulls the final result.
How Long Does It Take to Learn Henna Properly?
Realistically, most beginners can draw clean, presentable, simple designs within four to six weeks of daily fifteen-minute practice. That’s not years, but it’s also not a single weekend. How to learn henna for beginners isn’t about natural talent; it’s about repetition in short sessions. Studies on fine motor learning show that brief, frequent practice outperforms long, infrequent sessions. Twenty minutes every day beats two hours on Sundays.
What the learning curve actually looks like week by week:
- Weeks 1–2: Basic strokes feel inconsistent, which is normal; your hand is building motor memory that doesn’t exist yet.
- Weeks 3–4: Lines become steadier, U-curves start looking intentional, and you’ll notice when your pressure is off before the paste hits the surface.
- Weeks 5–6: Simple floral or vine designs start coming together; this is when most learners stop needing templates and begin improvising small motifs.
What Are the Most Common Mistakes Beginners Make With Henna?
Applying too much paste at once, skipping skin prep, and removing the design too soon. These three mistakes account for maybe 80% of disappointing first attempts. Henna classes in the UAE often cover design techniques but spend too little time on troubleshooting. Knowing what goes wrong and why saves a lot of frustration.
Here are the five mistakes that come up most often, and what actually fixes them:
- Pressing too hard on the cone floods the design and covers fine detail; ease up and let the tip do the work with minimal squeeze force.
- Applying on moisturized or oily skin creates a patchy, pale stain because the paste can’t penetrate the surface barrier. Always start on clean, dry skin.
- Peeling or washing the paste off before 4 hours reduces the stain depth significantly; 6 to 8 hours minimum, and overnight if you want a deep maroon color.
- Skipping practice on the glass and going straight to skin means every mistake costs you a session; the glass sheet is there so you can wipe off, start again, and learn faster.
- Using old or improperly stored henna paste that has lost its dye content, which shows up as an orange stain that never deepens, store cones in the freezer and use within a few days of thawing.
Final Thoughts
Learning henna is one of those rare skills that rewards you quickly if you respect the process. The first week feels clumsy. By the second month, your hand knows what to do before your brain catches up. Dubai has a rich mehndi culture, and there’s something genuinely meaningful about picking up this craft.
If you’re based in Dubai or the UAE and want structured, hands-on guidance rather than figuring it out on your own, Shifaz Henna offers expert henna classes tailored to all skill levels. From absolute beginners to those looking to refine advanced technique, the sessions are built around real practice, real feedback, and a tradition of artistry that’s been part of this region for generations. Ready to take your first real step? Book your henna class with Shifaz henna in Dubai today and start learning from henna artists who’ve done this for years.